Saturday 28 May 2016

Reflection

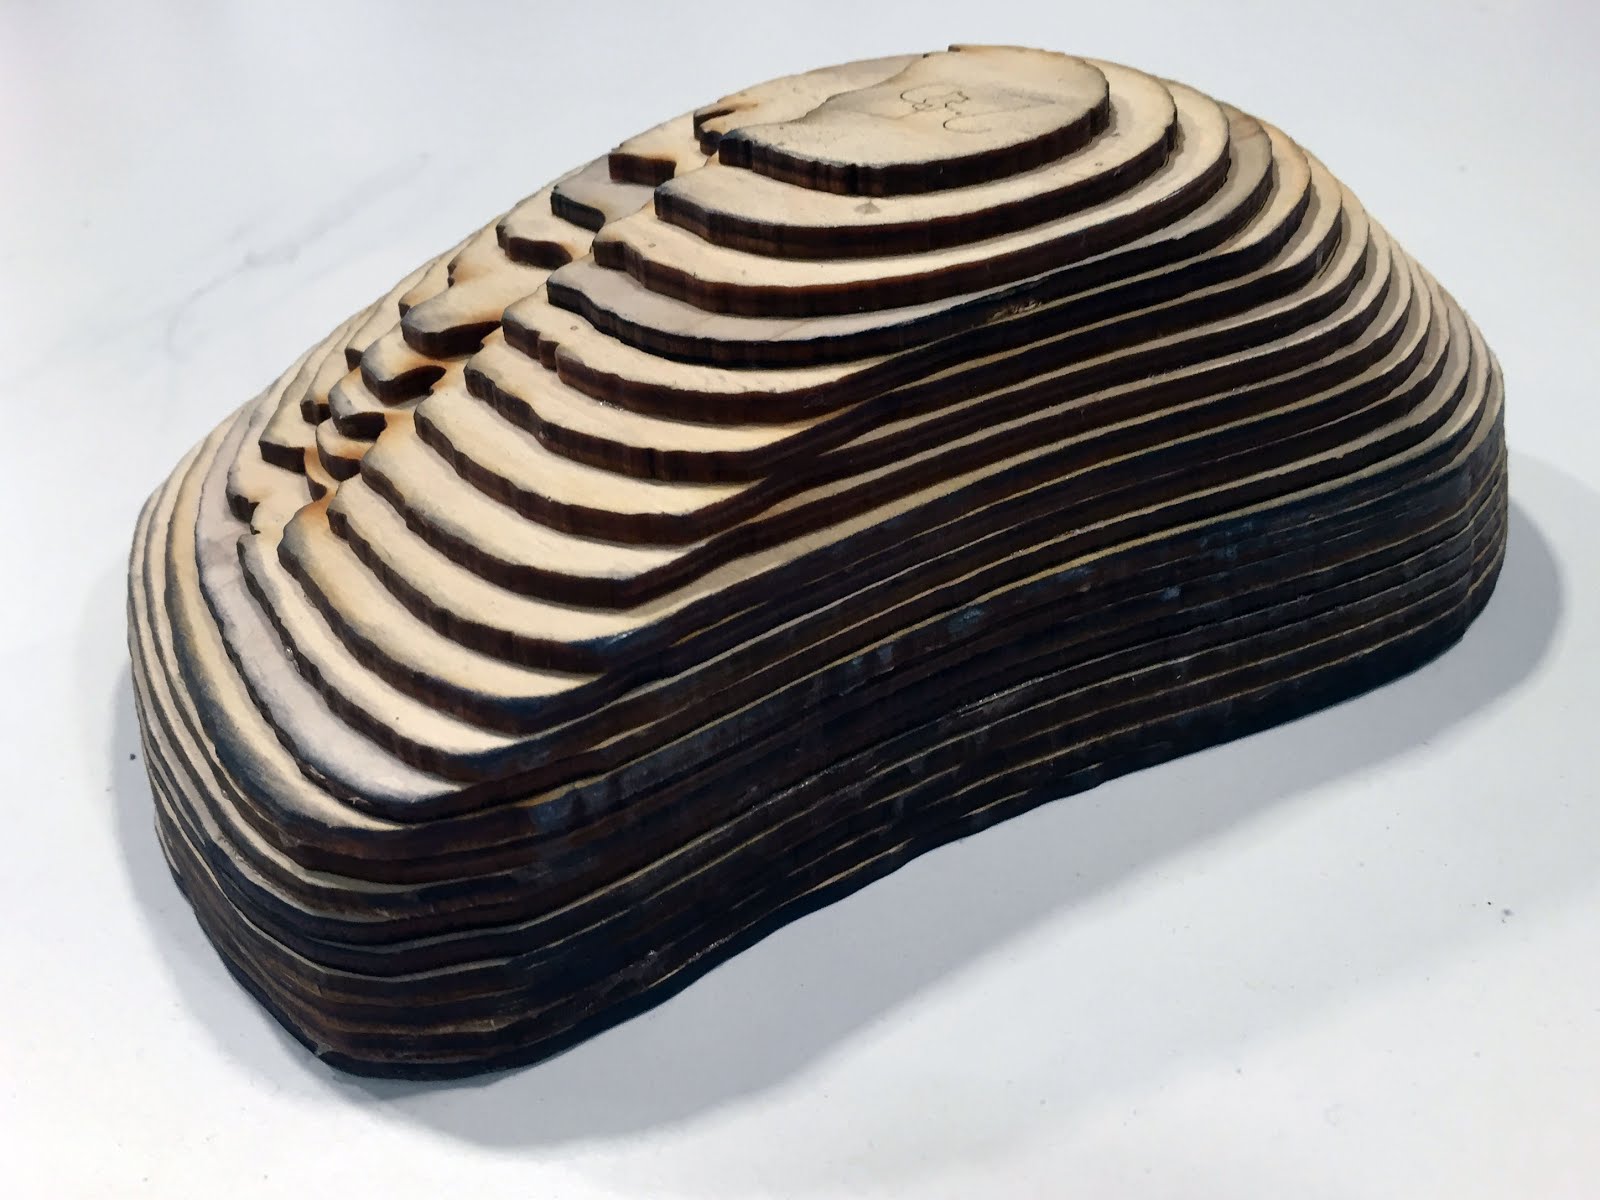
The basic steps in creating a metal skin is generally similar based on the two different objects based on our disciplinary forms. In making both objects, I relied heavily on the skeleton (as directly hammering the metal skin onto the skeleton), that is why stacking slices is used rather than other method. Stacking makes the skeleton to be sturdy enough to withstand hammering. Also, the curve is better in a way it is quite detail. The choice of material is consistent, by using 3mm plywood for skeleton and 1mm metal sheet for the skin. After using it in the first assignment, I think that my result is looking alright, so I keep on using the same material for my second assignment.

The difference is apparent during the making of metal skin for the different objects. Even though they started with same step by making a bowl shape, the approach on the skin is different. For the first object (orange peel), I use tools that are responsible for making circular shape, such as dome-shaping station and rubber mallet. During the second object, I mainly use English wheel to finalize the shape, as the curve is more delicate and flowing. That is why English wheel is a perfect tool to use for specific object with specific curve, such as mouse.

After finishing both of the skins, I reflected on how to approach my project better with a different strategy.

3D Shape

I was trying to be different by choosing orange peel as my chosen object. I think it is one of the representation of Sydney architecture, as it is the inspiration for Sydney iconic building, Opera House. My original intention is to model the skin of the orange as it folds into a circular-like shape. However, it is quite hard to be captured and modelled in real life. One thing that I should have done is to repair my model correctly in Meshmixer. I only focused in deleting the background that I actually forgot that the software can be used to fill gaps in the model. By having a better 3D shape, it would help in getting a better skeleton.

Scale

Scaling is one of the problem in my first assignment. The original document stated that the skeleton’s height would be around 260mm. I tried to change it to 200mm, but it is still quite large. That is why I reckon the metal skin would be smaller and easier if I rescale it to 150mm.

Different side for metal skin

I chose front side of the first skeleton as it shows more curve compared to the back side. However, at that time I did not think that I can model the top side. With the top side, I can still get a ball-shaped skin that shows different curves.

Tools introduction

During the first assignment (for the orange peel), that was my first time in the workshop, working with various tools that is never in my expectation I would ever use. Therefore, I was quite clueless in starting the first metal skin. Fortunately, with the help of Peter (when he’s available), I have an idea of how to use the tool and able to maximize potential of the metal skin with the help of using a proper tool. For the second assignment, I was quite confident because I have experience in using the tool and know the steps on how to start the skin. Therefore, I think I have a better result with the second assignment.

Experience

As stated in the previous step, I think I have a better result due to the experience of using different tools in my first assignment. The second object (mouse), is also an experience for my interdisciplinary friend. Therefore, I have inputs and feedbacks based on his performance before. He gave tips to finish the main curve first, then to move to the sides, right and then left side. His finished metal skin serves as a motivation and a standard as well for me, to get at least similar or a better result than his metal skin.

Overall, it is a new and a good experience for me in being exposed to different software and tools to create a 3D template and object (metal skin).

Original Tutorial


Wednesday 11 May 2016

Interdisciplinary Skin: Mouse

For our next assignment, we were being told to create another aluminium skin based on other students 3d template. It has to be students from other disciplines, so in my case, I need to find students from other courses than architectural studies. It was actually quite hard, as almost half of the class are from architecture, so Russell managed to make it easier by allowing more students in one student's template. So here we are, with 5 of us from architectural studies, to exchange template with Nicklaus from architectural computing.

His object is a mouse (as expected from his major).


It was a surprise as well when Nick decided to use my object (orange) for his template. As there are 5 of us, we decided to make our own template by ourselves, as he also suggested to use stacking method instead of waffling to get a more accurate curve of the shape. With the same material as last assignment, plywood 3mm, I made the skeleton for the fundamental shape of the mouse.


As with the metal skin, it was supplied by Peter from the workshop so I am not so sure with the specifications nevertheless, it is a 1mm round metal sheet.

The process starts by transforming the metal sheet into a bowl shape, then pressing it into the skeleton to know where the left and right curves established on the shape. The metal sheet is quite soft so you can definitely shape it with a little bit of pressure onto the skin.

After getting the overall shape, you can start using english wheel to smoothen the middle part of the mouse. I can say that english wheel is the most important tool for this shape, as it really determines the smooth curve of the mouse.


Different size of roller that can be used (depending on our shape)
Using english wheel to get smooth curve
Start shaping each of the sides by carefully hammering it directly onto the skin. Be careful with the right skin as it is quite complex with 2 curves going to different directions. The left side is much easier as the curve is going into a single direction. Use english wheel afterwards to make the surface clean.

Left side - single direction (inward)
Right side - two curve directions (inward and outward)

First attempt with the finished basic shape
In this stage, I feel quite accomplished with how the metal turning out. However, there are still some details that need some attention, such as the curve at the front and back, as it doesn't really fit perfectly with my skeleton. English wheel is the tool to help you reducing the gap between the skin and the template. Start using english wheel from where the curve begins to form so the skin can mimic the template perfectly.

Don't forget to cut some excess metal and clean the surface from marker and other debris with cleaning solution.

Final photo
Front view
Back view
Right view
Comparison between right and left curves

Sunday 24 April 2016

Creating metal skin

Using metal sheet from Bunnings Warehouse as there was not enough time to purchase metal from Dalsteel.

The specifications are as below


Worked in the workshop with various hammers and equipment to get desired metal skin.


I am doing half of the orange shape by choosing part that have more curves.


Progress photos


The process starts by transforming the metal sheet into a bowl shape, following the circular nature of the object itself. After the basic shape is done, then I start placing the bowl onto the skeleton and just directly hammer it to mark certain places with curves going on to different directions. Clean the uneven surface by hammering the metal skin with dome metal shaping station and wooden hammer, to minimize dents and bumps. Cut the metal sheets according to the skeleton and hone it with the metal sharpening object. Use english wheel for finalizing the skin.

Final product


Thursday 21 April 2016

Object Formwork

Laser cutting the formwork using plywood 3mm as the material.

54 pieces in total to be stacked together.


Some of the smaller pieces later on are not used, as they are not that significant in determining the shape of the object.


Stacking up all the pieces with glue then the form work is ready.


123D Make + Adobe Illustrator

Load in 3D Model in 123D Make with extension .obj from Meshmixer app.

Some errors might occur, stating that the model needs to be shrinkwrapped in order for the form work to work properly.


After shrink-wrapped it to the desired level, then the cutting could be done properly. There are several methods in building the framework. In the end, I chose stacking method as the other method such as interlocking did not work properly.
Red cutting means there are some error in the model, thus the form work could not be done
In order to get a finer curve-shape of the actual model, we need to add more layers horizontally and vertically. The scale can be adjusted as well. I scaled it down from 260 mm to 200 mm. 

For laser cutting, I am using plywood 600 x 300 mm with thickness of 3 mm. For the final result, I need to have 9 sheets with total of 54 parts needed to build the actual model.


Exporting all the sheets into .pdf and then doing some adjustments in Adobe Illustrator (based on module BHSM015: Laser Cutting - VLS 3.50 (2016)

Changing line color from the actual document to make color red to blue #0000FF and blue to red #FF0000. Red means cutting and blue means engraving.

Stroke weight needs to be changed to 0.001mm
Check the boundary also as the laser cutter might not cut shapes properly around the boundary.


123D Catch + Meshmixer

 Trying out the app with various objects found in classroom.

My backpack


Chair


There are tips on tricks on 123d app for a clean and better result of the 3D model, by using newspaper or post-it with scribbles to make it easier for the app to focus on various angles of the object.


After playing around with the app and understands how the app works with photographing 3D object, finally using it to take pictures of orange peels.

Using 2 orange peels, with careful thinking for orientation. Is it better to face it downwards or upwards?

Facing upwards


Facing downwards


Based on the result, it is better to orientate the oranges up as the app can grab all the circular texture (especially the base) clearly.

Using another software, Meshmixer to clean up 3D environment capture from 123D Catch.
Before
After


Now, it is ready to be processed in 123D Make to create formwork of the object.